Track creation in a DAW
Inexpensive software for home digital audio workstations (DAWs) has democratized music creation. You no longer have to go to a studio, or buy expensive stand-alone equipment, to make music. Or even play a musical instrument. As I (too often) tell people, the only musical instrument I play is the stereo. But after 18 years of practice I can now compose and produce more-than-passable songs using just software and a laptop.
Granted, programs like Apple’s GarageBand make the process even simpler by providing audio samples and loops that facilitate drag-and-drop song creation. It’s an easy way to start. But that approach has limits if you want to progress as a producer. A combination of a good ear for music honed by lots and lots of listening – a practice I can’t encourage enough – along with a basic understanding of music theory will allow you to produce more engaging and sophisticated tracks. The problem that remains: how to start?
I had thought composers relied on sudden inspiration; bolts out of the blue that let them access the music of the spheres. Or something like that. The reality is a bit more mundane, but no less remarkable. In this blog entry I’ll outline one approach I’ve used to compose music, something more like throwing yarrow stalks to construct I Ching hexagrams.

DAW rack metaphor
Back in 2002 I purchased a copy of Reason, a software DAW recommended to me by my friend Joe Paradiso after I mentioned that I wanted to start producing music. Reason is unique in that it uses a visual metaphor for a rack of synthesizers, amps, and effects. That made the process of software music creation a bit less abstract. Each “device” in the rack is just a user interface that represents an underlying software module which solves difference equations. The UI makes what you’re working with more concrete: a synthesizer, a reverb, a filter, etc. Connect a MIDI keyboard to the laptop, fire up the software, then select a device to play it. Or record notes in the software’s sequencer window.
A DAW’s sequencer window is like a piano roll, as illustrated in the figure below. Scrolling from left to right means progressing in time. Notes are played in sequence, hence the “sequencer” moniker. Horizontal lanes mark the locations of notes; the piano keyboard at the window’s left side associates each lane with its corresponding note. Small rectangles in the sequencer window represent specific notes. The width of these rectangles correspond to a note’s duration: 8th notes, quarter notes, etc. All MIDI notes have a corresponding note, duration, and velocity, e.g., how hard you strike the key, as shown at the bottom of the sequencer window. Markers can be placed at the start and end of a consecutive set of measures to demark the limits of a loop, a portion of a song that can be played over and over (and over, and over).

Synth chords – the basis of the entire track – in the sequencer window
Drawing notes in a sequencer window, along with looping a range of measures, are two features that I utilize to sketch out a new song. As shown above I can “throw” a series of 3-note chords using a drawing tool. Once drawn these can be pushed up or down (for higher or lower notes), moved left or right (to earlier or later beats in one or more measures), shortened or stretched (to create anything from 1/64th pizzicato to long legato notes, or even drones). These chords are assigned to a software synthesizer, which converts the MIDI notes to audio in a way that reflects the synth’s characteristic timbre. So I set loop points, and repeat (e.g., loop) those chords over and over (and over, and over), editing notes, moving them around, until something sounds “good.”
Now “good” is in the ears of the beholder. However, I’ve found that if the loop sounds good, or complete in some way, the chords often progress along the circle of fifths or some other familiar tonal sequence. Given my listening history, it’s really not surprising.
In the audio sample below you can hear the chords that formed the foundation of a song I was writing. I had just seen John McLaughlin and Jimmy Herring perform a set of Mahavishnu Orchestra songs, and sought to create something with that feel – or perhaps mid-70s / early-80s Jean-Luc Ponty. That also drove my selection of synth sound. So go ahead and click the sample to hear the chords. Don’t worry, it won’t loop; you’ll get one pass through.
My favorite jazz fusion bassist is probably Ralphe Armstrong. I wanted to develop a bass line that had the flavor of his Fender jazz bass from the “Jean-Luc Ponty Live” album (listen to “Aurora, Pt. 2” to see what I mean). So I copied the synth chords into the sequencer lanes for a bass synthesizer, and only keep the root notes. I shifted those down an octave; it’s a bass line after all. Next I tossed out about half of the notes, lengthened some, and moved things around a bit until I arrived at the bass line you hear in the clip below. The process was very iterative, but given the initial synth chords it was easy to start – and starting is usually the hardest part.
Drums can “played” using a device called a sampler. Samplers don’t construct their sounds from signal generators and filters like synthesizers do. Instead, they use recordings of the instruments they are to emulate – e.g., samples, hence the sampler moniker – and play these samples in response to MIDI notes. The MIDI note lanes for a drum sampler corresponds to the elements of the drum kit: the kick drum, snare, toms, high hat, ride and crash cymbal, etc. The MIDI drum notes trigger hits of the corresponding samples.
The collection of samples for a given drum kit’s elements is called a “patch,” and I downloaded an R&B drum kit patch into a sampler device. Then I dropped a jazz MIDI drum pattern into the sequencer, and edited the daylights out of it. You can hear a bit of the drum track in the sample below.
With all these pieces, you’ve got the framework of a song. The three parts described above are layered one on top of the other, then looped to see if they sound pleasing. You can hear this basic song framework in the sample below.
I’ve used this approach to compose several songs. More often than not I keep adding bits to the basic 8- or 16-bar loop – percussion, pads, the beginnings of a melody – until I feel that I’ve roughed out all of the song’s components. All those parts layered one atop the other can get pretty busy, and sonically dense. But it gives you a sense of how things fit together; how the instruments relate to each other (or sometimes, not).
Note that this process doesn’t provide the song’s arrangement: the intro, outro, breaks, verse / chorus, and how these relate to each other. That will be the topic of a different blog post. But if you’ve layered enough parts atop each other you can “pull them apart” to create different pieces of the arrangement.
So for this track I wanted to follow the jazz style of various players performing solos, one after the other. I knew I wanted a piano, something a bit more percussive than the synth used in creating the base chord sequence. But how to create the piano part? For that, I copied the synth’s chords into the MIDI lanes of a piano sampler. And rather than use those to play the piano directly I routed the notes through a device called an arpeggiator. An arpeggiator takes either MIDI root notes, or MIDI chords, and creates arpeggiations of those based upon rules you define, such as the octave range of the resulting notes, note duration / tempo, number of notes in each arpeggiation, etc. The number of variables is immense, but I played around with them until I hit upon the sequence below.
Lastly, I wanted an electric violin playing long legato notes. You know; Jean-Luc Ponty and all. So I added a violin sampler, ran its output through a series of delay and reverberation effects, adjusted the attack, decay, sustain, and release (“ADSR”) of the violin samples, and played the sampler using MIDI notes cherry picked from the original chord sequence, stretched. You can hear the results below.
All of these bits gave me enough to start developing a basic arrangement: intro, the synth theme, piano, some percussion, the violin, and so forth. In the sequencer window shown below you can see the icons of assigned devices just left of center, with corresponding note lanes stretching out to the right, for this basic arrangement.
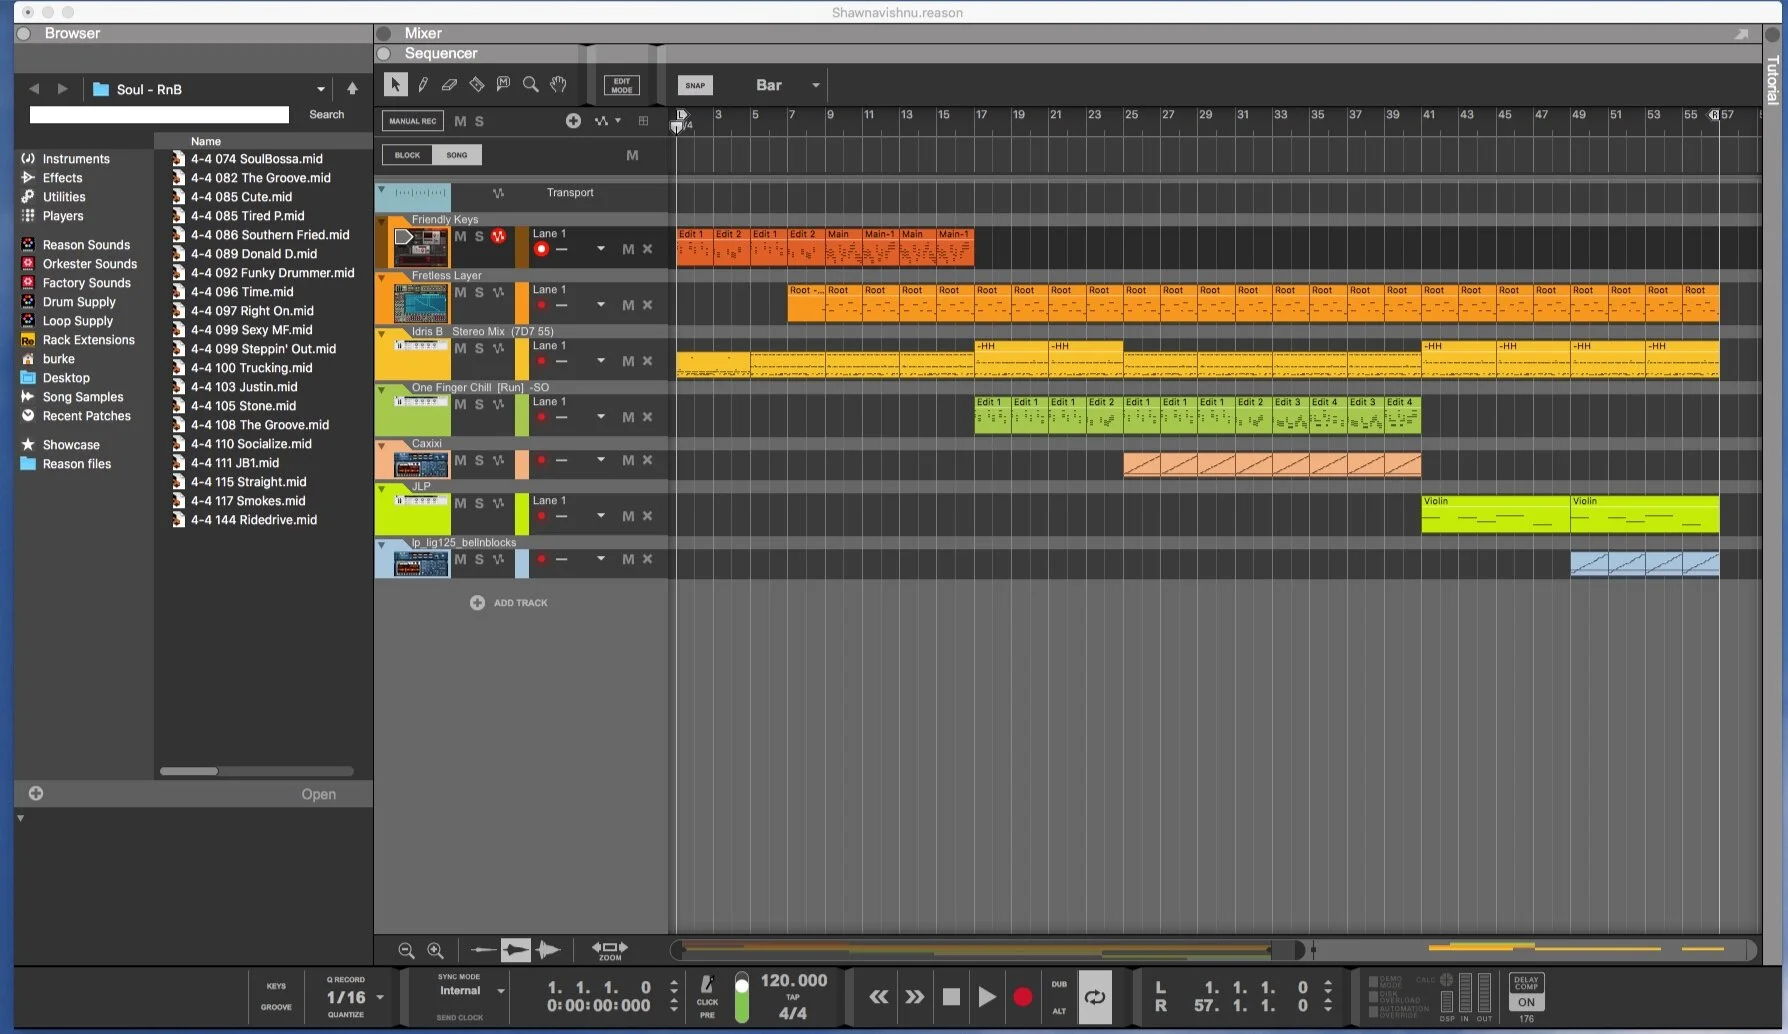
The beginnings of a track
The process continued until I developed a complete song, including a couple of bridges, a bass solo, a recap of the theme, and the eventual fade out. You can hear the entire track, “One Thought,” below.
This track came together fairly quickly; most of the parts were in place over the course of about a week. But there were countless iterations after that until I was happy with the track – both its content, and its sound. One reason I enjoy this track is because there is a lot of space in the mix. And now, rather than thinking about how I crafted each bit, I can just lose myself in the music. That, to me, is the ultimate payoff of the process. I get to create music that I want to hear, music that doesn’t exist anywhere else.
(c) 2020, Shawn Burke, all rights reserved.